simple drop earrings

bowl

When it comes to earrings, I usually wear studs, but lately I’ve been liking drop earrings. I like that they tend to be a bit more sparkly, and catch the light when you move. I’ve been eyeing these charms at Michaels for awhile, but haven’t had an excuse to buy them. They have larger ones that I thought would make a cute necklace, but the last time I was there I started thinking about making the smaller ones into earrings.

close up

This project could not be simpler. It seriously took me longer to find my pliers [I am pretty sure that they must walk off when I’m not looking] than it did to actually make the earrings. I can’t wait to wear them. 

how to: make chicken stock

On Monday I posted about roasting chicken. After I make a chicken, I usually make stock. It is super easy to do, and I find that it is so much better than store bought stock because I can control the salt content. If I don’t have time to make stock within the next couple of days, I just stick the bones in a freezer bag and freeze it until I am ready.

chicken stock

Ingredients:

  • Chicken carcass, any excess skin removed
  • 2 onions, quartered
  • 2 carrots, cut into large chunks
  • 2 stalks of celery, cut into large chunks
  • 2 tbsp peppercorn, lightly crushed
  • 1 tbsp crushed parsley
  • 1 bay leaf
  • salt (optional)

Directions:

  1. Place everything into a large pot. Pour approximately 3 quarts of water over everything. I usually just fill up the whole pot until it is mostly full. Turn on to medium-high heat and bring to a boil.
  2. Once it is at a boil, turn down the heat until it is a simmer. Cover and let simmer for 3 hours. Check on it periodically to make sure that it hasn’t boiled down too much. Add a bit of water if it is looking low. Use a wooden spoon to skim any foam off the top.
  3. After 3 hours, turn off the heat and let it sit for a while until it has cooled slightly. Place the pot in the refrigerator overnight. In the morning it should look like this: cold
  4. Using a wooden spoon, remove the fat (the stuff on top) from the top. You can use another spoon, but I find that the fat sticks better to the wood. Strain the rest of stock through a mesh strainer to get rid of any solids. Pour the collected stock (there should be about 12 cups) into containers to either freeze or store in the refrigerator. ready to freeze
  5. If you are planning on freezing it, leave about 1 inch of room so it can expand. Keep in the refrigerator for about a week, or in the freezer for up to 2 months.

grocery list

grocery list

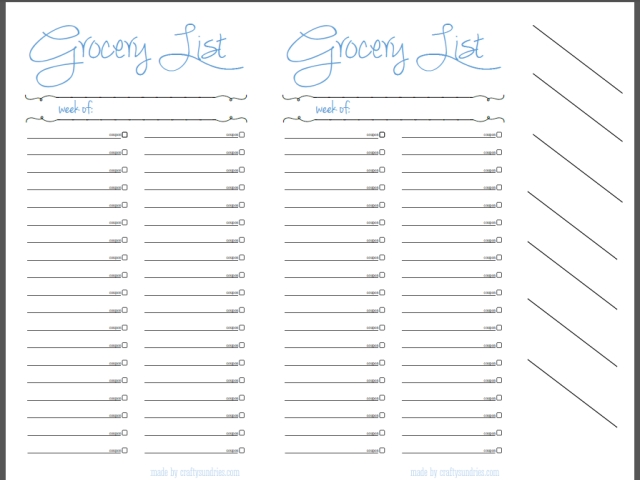
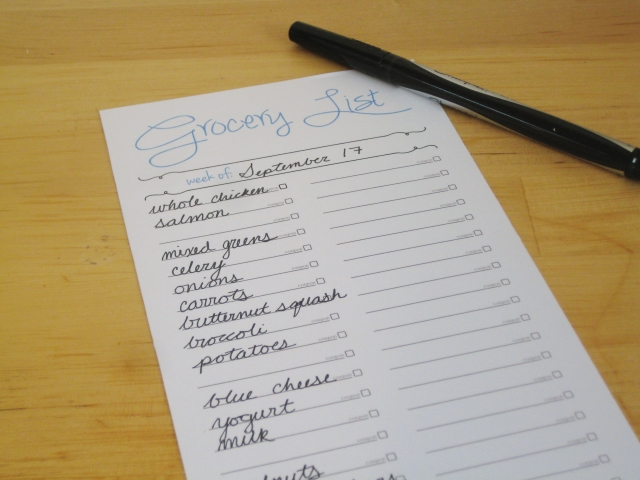
On Tuesdays I go grocery shopping.  I try to go only once a week because it cuts down on impulse buys. This requires weekly menu planning, which is a post for another time. I used to write out my list on scrap pieces of paper, but I found that I always lost them or they would be completely unorganized so I would wander around the store. I decided to make my own printable lists, which would force me to be more organized. I originally laminated the list and used vis-a-vis wet erase markers to make my list, but I found that if my hands were wet at all, say from an iced coffee, I would smear it and end up with marker all of over my hands. I went back to just printing them on card stock and using a marker [currently I am loving the sharpie pen]. The list has enough lines for even the biggest shopping list, and there is a check box if you have a coupon. I have a menu board that I keep a running list of items that I need to buy for the week, and usually plan my meals, including the items that I need to buy, on a scrap piece of paper. Before I go shopping, I write out the list onto the main list and group the items by section/aisle. This makes shopping a breeze, and I can be in and out of the store in no time.

full grocery list

Each page has two 4.5″ by 8.5″ list, and you can download it here:  grocery list

how to: roasted chicken

When I first started cooking I was completely intimated of roasting a chicken. It seemed so out of my league that I never even attempted it. It wasn’t until I came across Glamour’s recipe for engagement chicken, that I decided to give it a go. I made it for my friend Jen and my mom, and it turns out that it wasn’t hard at all to make a chicken. [Side note: engagement chicken actually works, I have a couple of friends that made it for their boyfriends, and were engaged shortly after]. While engagement chicken is a decent recipe, I found a recipe that is even simpler and the result is absolutely perfect crispy skin, and super juicy chicken. I have adapted it slightly from a recipe for Wegmans, which calls for Wegmans brand items. Also, just as a warning, this smokes a lot but it isn’t burning. I usually open a window and turn on the fan while making this so I don’t set off my fire alarms.

roast chicken

Roasted Chicken

adapted from Wegmans


Ingredients:

  • 1 whole chicken, about 6 lbs
  • 1 tbsp vegetable oil
  • 1 tbsp seasoning // use whatever type of seasoning you want, I like McTwigan Rubba Chicken

Tools:

  • kitchen twine
  • meat thermometer
  • rimmed baking sheet or shallow pan // I used a 9×13 stoneware baker

Directions:

  1. Preheat oven to 450 degrees.
  2. Let your chicken rest on the counter while your oven is preheating, about 15 minutes.  If your chicken has any giblets in it (they are usually in a small bag in the cavity), remove them and either keep or discard them. Use a couple of paper towels to pat down the outside and the inside of the cavity. Do not rinse your chicken.  If there is a plastic thermometer, remove it and throw it away.
  3. Place your chicken on the pan. Rub all over with oil. Sprinkle seasoning all over the chicken, and rub it in so it mixes with the oil. Using about 24 inches of baking twine, truss the chicken. I start across the back so the wings are tucked in, cross it underneath and then tie the legs together. You can see in my picture that the one of the wings has popped out during cooking, but that is fine. I find that with the oil on the chicken, I never have any trouble with removing the string for the presentation, but if you are worried about it, you can use a little shortening on your twine before you truss the chicken.
  4. Roast on center rack of oven for 15 minutes. Reduce the heat to 350 degrees. Roast about 1 hour 30 minutes, until the temperature of the chicken reaches 165 degrees. Check by inserting your thermometer halfway into the thickest part of the inner thigh where the leg connects to the body, away from any bone.  If for some reason you are missing/don’t have a meat thermometer, you can also test by wiggling one of the legs. You should easily be able to pull the thigh/leg away from the rest of the bird and any juices that appear while you do this should be clear.
  5. Once your chicken is cooked, remove it from the oven and cover the pan with aluminum foil. Let rest for at least 15 minutes. This will allow the juices to redistribute, which will result in a super moist chicken. You can now transfer your chicken to a serving platter, or carve in the kitchen and then serve, which is what I prefer to do.